A DQM Quality Assurance Project Plan (QAPP) EDD can be created and uploaded into the EQuIS database via Professional EDP. When creating a DQM QAPP EDD, utilize the template file DQM_checks_v7.0.xlsx (before v7.0.19214) or DQM Starter QAPP.xlsx (beginning with v7.0.19214), (typically located in C:\Program Files\EarthSoft\EQuIS\Formats\DQM or for per-user installation, %localappdata%\Programs\EarthSoft\EQuIS\Formats\DQM).
Locate the DQM QAPP EDD (DQM_checks_v7.0.xlsx or DQM Starter QAPP.xlsx) and save the file with a new name that contains the name of the project or DQM QAPP.
Review and modify the template file, based upon company and/or project requirements. Perform the following steps to create a new DQM QAPP EDD. For more information on the data tables referenced by each check, see DQM Data Sources.
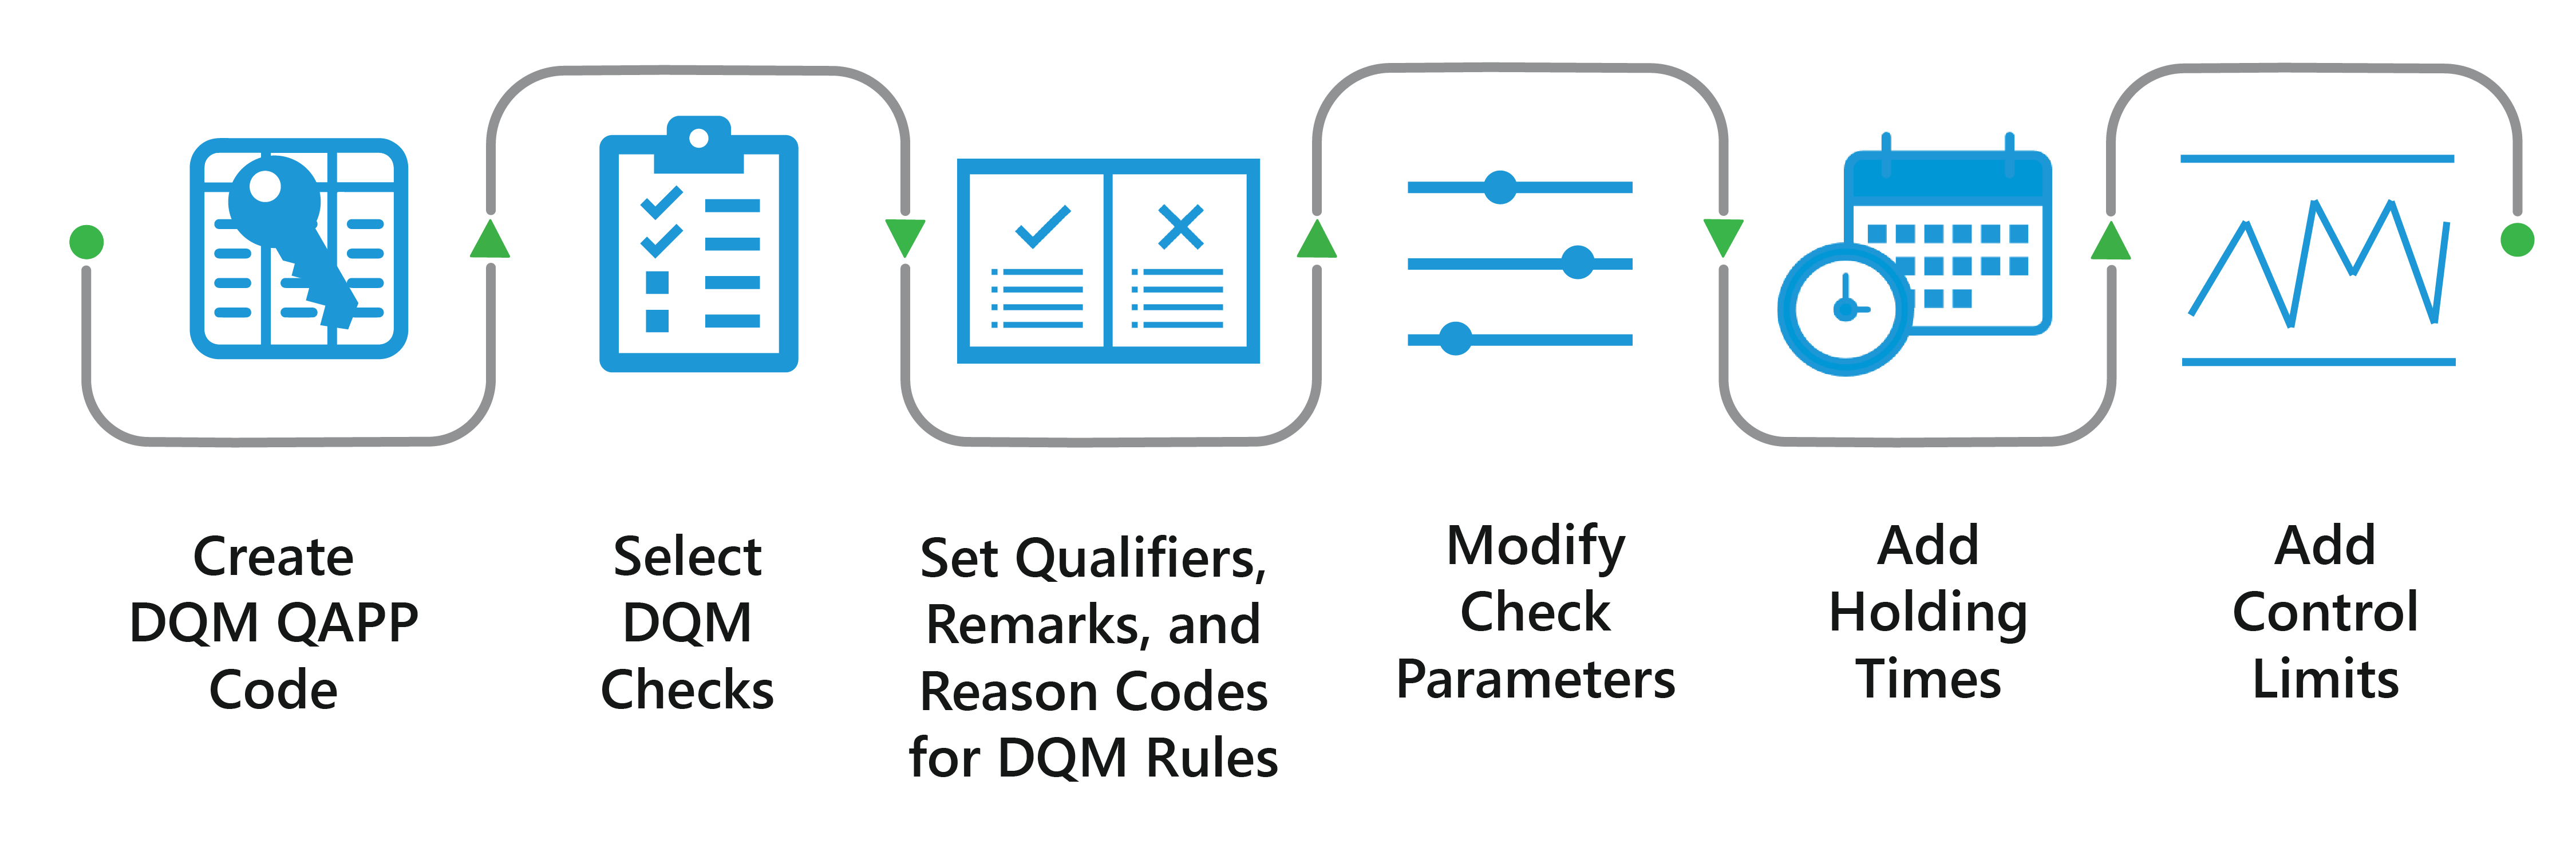
Click the stages above to go to the corresponding step.
a.Open the DQM QAPP EDD to the RT_DQM_QAPP spreadsheet. The DQM Starter QAPP file comes pre-populated with several DQM QAPPs to illustrate that multiple DQM QAPPs can be defined and input into the same EDD.

b.Create a DQM QAPP Code for your project by populating the DQM_QAPP_CODE in RT_DQM_QAPP. Populate the other fields in the worksheet for the QAPP description and remark as desired.

c.If you desire to use the DQM functionality for associating target analytes to specific surrogate or deuterated monitoring compounds for the surrogate recovery check, keep the DQM_QAPP_CODE = QAPP_SURR_ASSO_CAS_RN in your DQM QAPP. Delete any of the pre-populated data that are not applicable to your project.
d.If you have previously uploaded a DQM QAPP and desire to inherit its checks, rules, and parameters, but not its holding times and/or control limits, input the PARENT_QAPP_CODE field with the DQM_QAPP_CODE of the DQM QAPP you desire to inherit. Note that any changes made to the PARENT QAPP will continue to be inherited by the new “child” QAPP.
2.Select the DQM Checks to be included in your DQM QAPP
a.Open the DQM QAPP EDD to the RT_DQM_CHECK spreadsheet. The DQM Starter QAPP file comes pre-populated with all available DQM Checks; however, the checks are included across the three different DQM QAPPs included in the file. Review the DQM Checks online documentation for a description of each of the available DQM checks and determine which checks that you would like to include in your DQM QAPP.
b.Delete the rows for the checks that do not apply to your QAPP. Modify the description and remark fields as desired.
c.Edit the DQM_QAPP_CODE to match your input in Step 1. (Hint: A global Find and Replace with the "Within" option set to "Workbook" is best for changing the DQM_QAPP_CODE). Continuing with the above example, the RT_DQM_CHECK tab would be changed as shown below.

3.Modify qualifiers, remarks, and reason codes for all DQM Rules
a.Open the DQM QAPP EDD to the RT_DQM_RULE spreadsheet. The DQM Starter QAPP file comes pre-populated with all rules for the DQM checks.
b.Delete the rows for rules for the DQM checks that were removed in 2B so they are not included in your DQM project QAPP.
c.Modify column “D” (qualifier) with the qualifier you desire to use to flag the associated detected analytes when the DQM rule is exceeded. Modify column “F” (nd_qualifier) with the qualifier you desire to use to flag the associated non-detected analytes when the DQM rule is exceeded. Input the value “NQ” for any instances that you desire no qualifier to be applied by DQM when the rule is exceeded. The DQM-refvals format will not accept a NULL value in either the qualifier or nd_qualifier columns.

d.Modify column “E” (remark) with the text you desire to be displayed to describe the Quality Control (QC) failure associated with the data. This will be used to populate the Apply Remark field in the DQM Event Form.
e.Locate and open the RT_DQM_REASON spreadsheet in the DQM QAPP EDD. Reason codes are short codes to describe why qualifiers are added to results when QC excursions occur. See the help article Ranking Qualifiers and Reason Codes for more information. Modify the reason codes that come pre-populated in RT_DQM_REASON.REASON_CODE and add descriptions and remarks as desired.
f.Return to the RT_DQM_RULE spreadsheet and modify the reason codes in column G, H, and I that you desire to use as a short code to describe why that qualifier has been added to a result. The reason code is stored in DT_RESULT.DQM_REASON_CODE when a result record is qualified and in DT_RESULT_DQM.REASON_CODE.
a.Open the DQM QAPP EDD to the RT_DQM_CHECK_PARAM spreadsheet. The DQM Starter QAPP file comes pre-populated with all the parameters for all available DQM checks.
b.Delete the rows for the check parameters for the DQM checks that you do not want to include in your DQM project QAPP, as done in Step 2B.
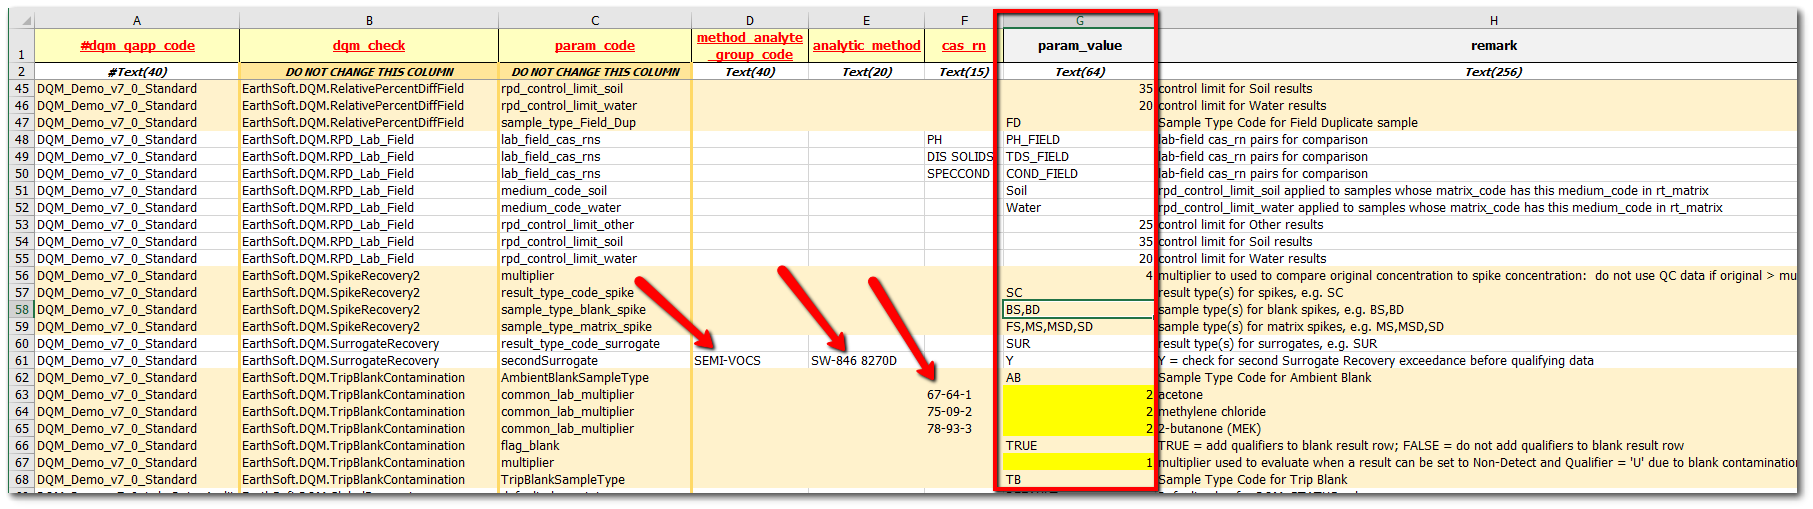
c.Modify column “G” (param_value) for each check parameter according to your project needs. Review the online documentation for each check for details about each check parameter. In some instances, you may also need to edit the analytic method and/or cas_rn fields based upon your project needs.
d.Open the DQM QAPP EDD to the RT_DQM_CHECK_PARAM_TYPE spreadsheet and delete the rows for the check parameters for the DQM checks that you do not want to include in your DQM project QAPP, as done in Step 2B.
a.Open the RT_DQM_HOLDING_TIME_V2 spreadsheet in the DQM QAPP EDD. The DQM Starter QAPP file comes pre-populated with example data for how the spreadsheet should be populated.
b.Modify RT_DQM_HOLDING_TIME_V2 to include the holding times for all analytical methods, medium codes, cas_rns, and prep method combinations for your DQM project QAPP. See the online help article DQM Check for Holding Times for more information.
a.Open the DQM QAPP EDD to the RT_DQM_CONTROL_LIMITS spreadsheet. The DQM Starter QAPP file comes pre-populated with example data for how the spreadsheet should be populated.
b.Modify RT_DQM_CONTROL_LIMITS to include the QC limits for each analytical method, matrix, and cas_rn combinations for your DQM project QAPP. See the online help article DQM Control Limits for more information on populating the control limits.
7.On the worksheet RT_MATRIX, populate the MATRIX_CODE and MATRIX_DESC with all the field matrices that are applicable to the project.
Note: In the DQM forms, any list of checks will display the DQM_CHECK_DESC column. There are a couple of things to consider: •The checks can be displayed in a language other than English by changing the DQM_CHECK_DESC column. •Although the DQM_CHECK_DESC column will accept 255 characters, DQM forms only display about •If the DQM_CHECK_DESC column is blank, the user will get an error when trying to select checks to Start an Event. |
8.Save the file.
9.The next step is to load the modified DQM QAPP EDD file to the EQuIS database using Professional EDP. On the EQuIS Professional Home ribbon, select the EDP button.

10.Click the Format button and select DQM-refvals.zip from the installed DQM files, typically located in \Programs Files\EarthSoft\EQuIS\Formats\DQM.
11.Select the EDD button.
12.Select the modified DQM Checks EDD created in the above steps.
13.Create and Commit the EDD.
Note: For updating an existing DQM install, load the latest DQM_Checks EDD using the Insert and Update commit type. |