The Land Access page in SPM Enterprise provides an easy way to view, create, or edit land access information, including permits. Select the Permits tab to add, modify, or delete a permit.

Existing permits are displayed in the grid by permit type. Which permit types are available in the grid can be specified. To add or remove a permit type, click the +/- button to open the Add/Remove Types dialog window.
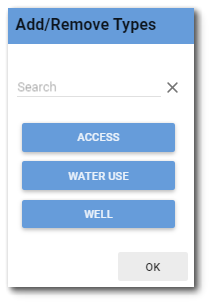
All available permit types will be displayed. Selected permit types are displayed as blue buttons. The Search pane at the top of the dialog box can be used to find a permit type for large data sets. Select and deselect permit types as desired and then click OK. The selected permit types will be displayed on the Permits tab.
Click on the desired Permit Type. The permit type will be displayed in blue and the Permits grid will be populated with database records associated with the selected permit type.
If a specific location was previously selected, then the only permits associated with the selected location are displayed in the grid.
Setup Grid View
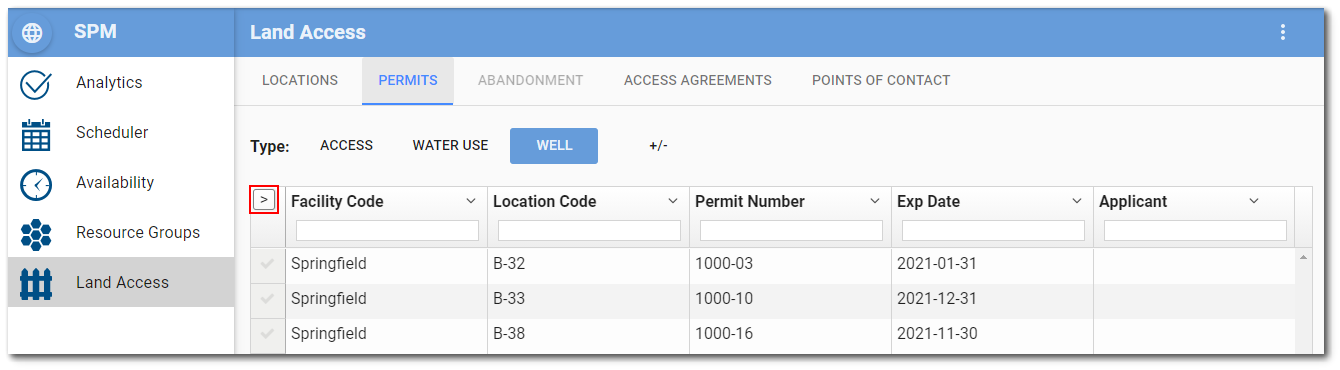
By default, the Permits grid displays the facility code, location code, permit number, permit expiration date, and applicant for each permit. However, users can permanently change which permit fields are displayed using the gridColumns tab setting. See tab settings on how to apply this to the tab as well as other available settings. Fields (columns) can also be temporarily added or removed from the grid for the current session, by clicking the arrow icon ![]() in the upper-left corner of the grid.
in the upper-left corner of the grid.
All available fields will be displayed in the sidebar menu. Selected fields are highlighted in blue.
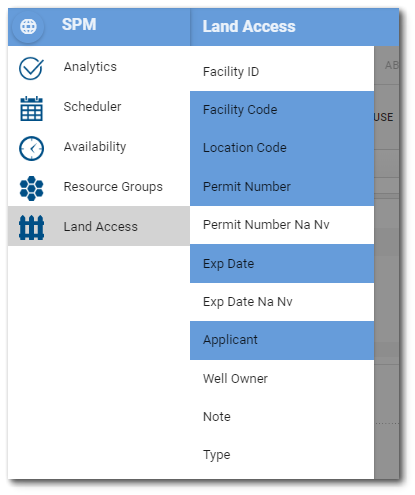
Select and deselect access agreement fields as desired and then click anywhere on the page to close the sidebar menu. The selected fields will be displayed in the grid on the Permits tab.
To resize a column width in the grid, hover the mouse over the right-side of the column header to display the || icon and then use the mouse to drag to the desired column width.
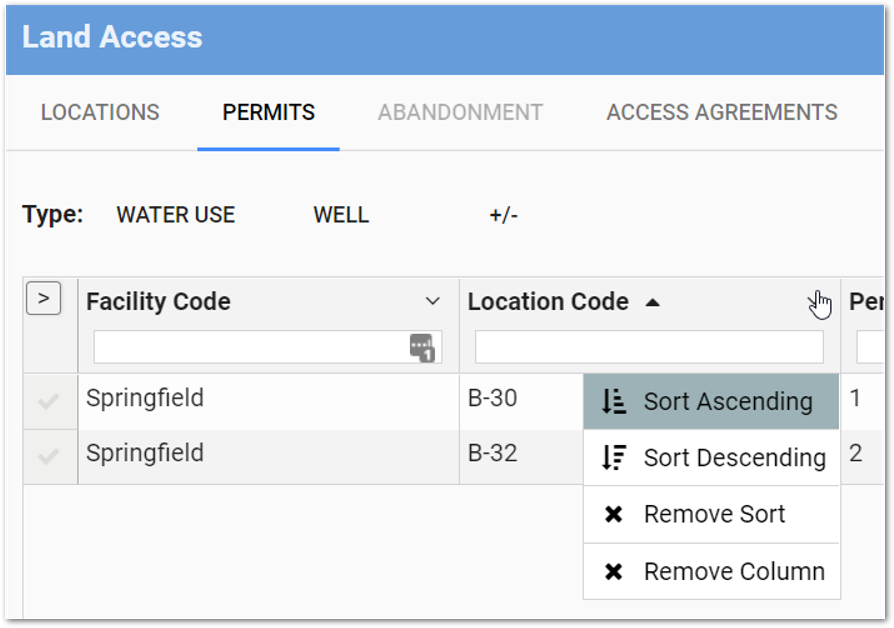
Users can also sort the data in each grid column or hide a grid column. Click the down arrow ∨ in the upper-right corner of the desired column header to open a drop-down menu. Permit field values can be sorted ascending or descending. Once a sort order has been selected, a "Remove Sort" option is available.
Create New Permits
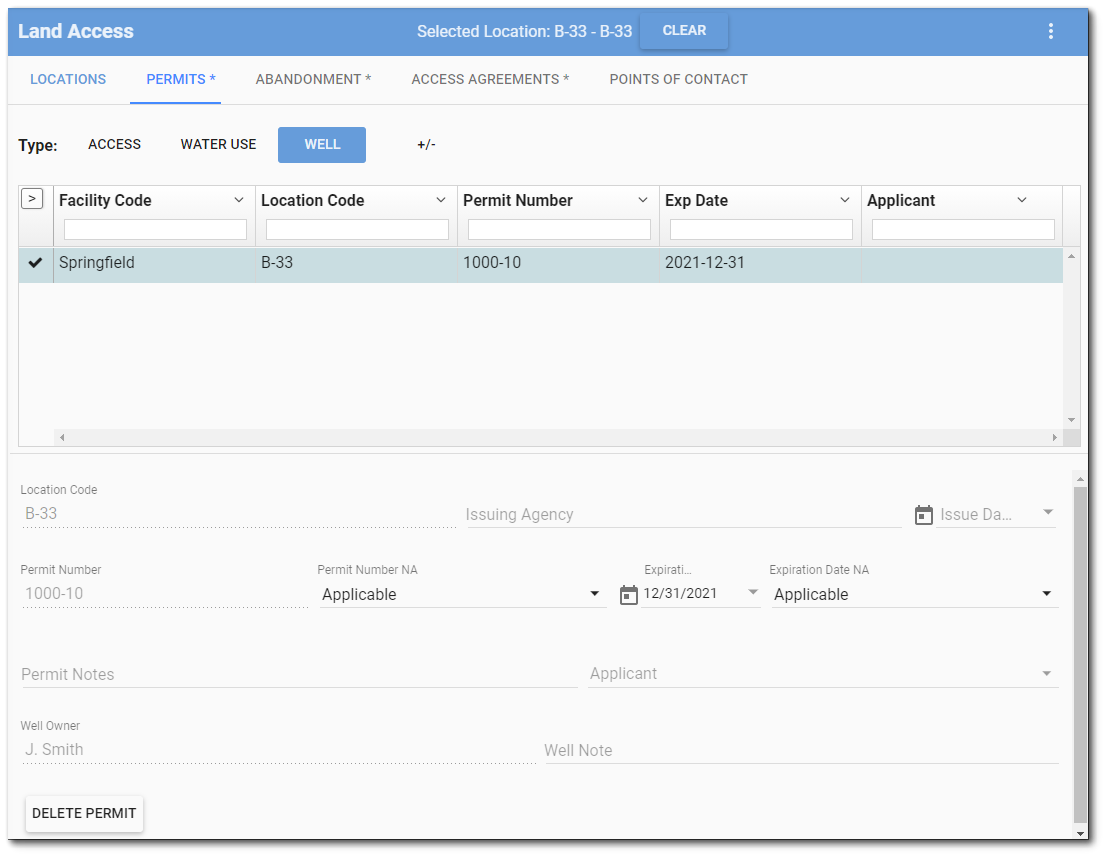
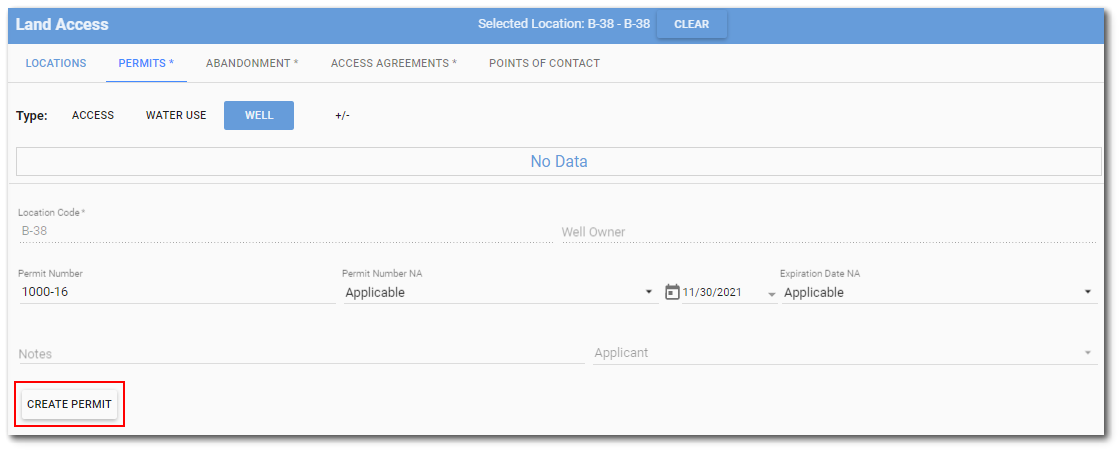
A location must be selected from the Locations tab to be able to create a new permit. Once a location is selected, ensure that no existing permit record is selected and then enter in the desired information. The Location Code is automatically populated with the selected location.
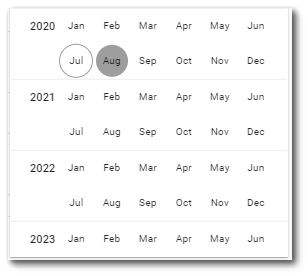
Type directly in the text boxes. The Permit Expiration Date field may be edited using the calendar tool or by entering the date manually in the text box. Click the calendar tool icon ![]() to use the calendar tool. Changing the value in the text box will also update the calendar tool. The calendar shows the selected date highlighted with a solid circle and today's date highlighted with a circle outline. If Today's date is selected in the calendar tool, it will remain highlighted with a solid circle. To select a different month or year using the calendar control, click on the name of the month or the arrow pointing forward at the top of the control. This changes the calendar tool from the month view to the year view. Once in the year view, scroll through the available years as desired. The current selected month will be highlighted with a solid circle. Select the desired month/year combo to return to the month view to pick a specific date.
to use the calendar tool. Changing the value in the text box will also update the calendar tool. The calendar shows the selected date highlighted with a solid circle and today's date highlighted with a circle outline. If Today's date is selected in the calendar tool, it will remain highlighted with a solid circle. To select a different month or year using the calendar control, click on the name of the month or the arrow pointing forward at the top of the control. This changes the calendar tool from the month view to the year view. Once in the year view, scroll through the available years as desired. The current selected month will be highlighted with a solid circle. Select the desired month/year combo to return to the month view to pick a specific date.
Month View
|
Year View
|
|---|

If a permit number and expiration date are entered, the "Applicable" drop-down menu for each category is set to "Applicable" by default. Click the drop-down menu for either field to change to either "Not Applicable" or "Not Available".
Permit Number – When applicable the value is stored in both DT_DISCHARGE_MONITOR.PERMIT_NUMBER and DT_PERMIT.PERMIT_NUMBER. Otherwise, the value is stored in DT_PERMIT.CUSTOM_FIELD_1, and "Not Applicable" maps to "NA" and "Not Available" maps to "NV".
Permit Expiration Date – When applicable the value is stored in DT_PERMIT.EXPIRATION_DATE. Otherwise, the value is stored in DT_PERMIT.CUSTOM_FIELD_2, and "Not Applicable" maps to "NA" and "Not Available" maps to "NV".
Click the Create Permit button and the new record will be added to the database and will appear in the Permits grid. The SPM Enterprise Land Access feature stores the permit information in the DT_PERMIT and DT_DISCHARGE_MONITOR tables.
To edit an existing permit record, click on the desired Permit in the grid. To find the desired permit, the grid can be filtered and/or sorted as previously described. Once selected, any existing information for the permit is displayed in the text boxes beneath the grid. Enter or modify the permit as needed.
Warning: The SPM Enterprise Land Access page is directly connected to the EQuIS database. Information entered, changed, or deleted on the page will immediately be reflected in the database tables. |
To remove a permit, click the Delete Permit button.