•Enter or Modify Location Information
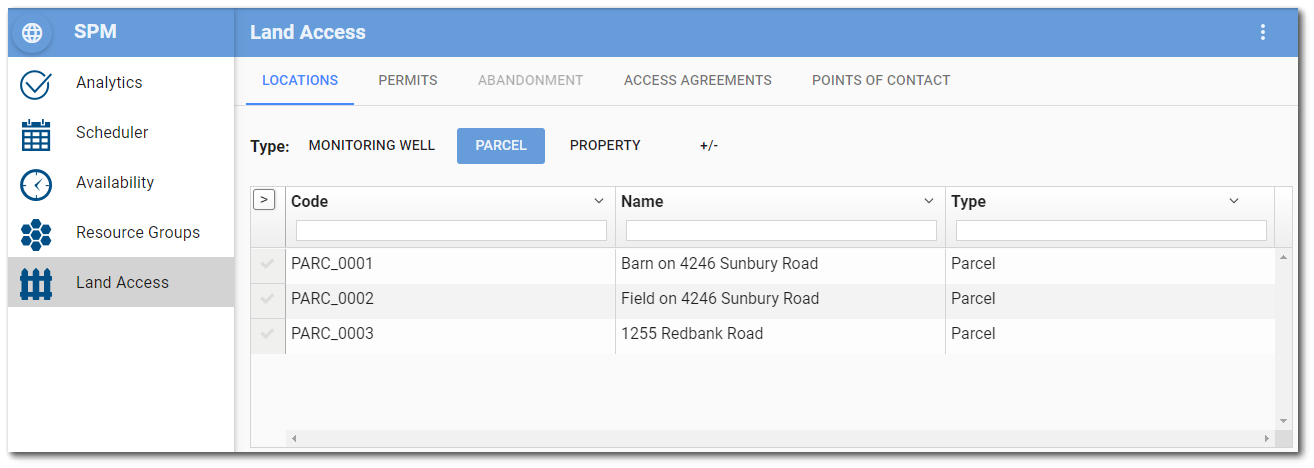
The Land Access page in SPM Enterprise provides an easy way to view, create, or edit land access information for a specific facility. Land access information is location specific. Select the Locations tab to choose a location.
Location Types
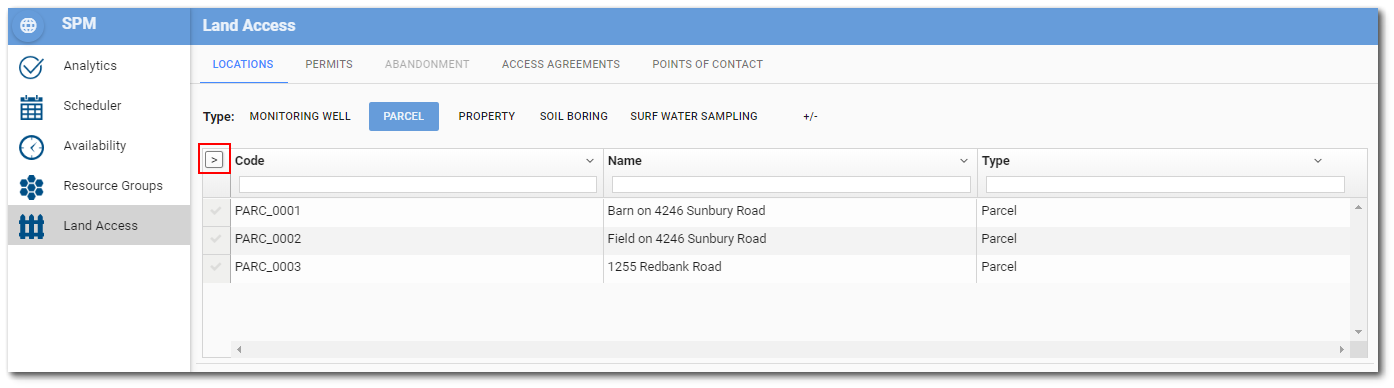
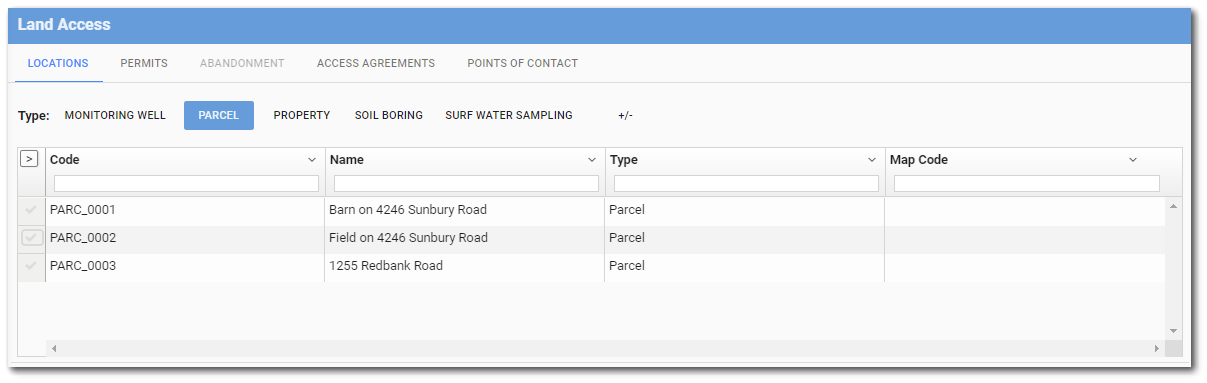
Locations (i.e., SYS_LOC_CODEs) for the selected facility are displayed in the grid based on the selected location type (e.g., monitoring wells, parcels). Which location types are available in the grid can be specified. To add or remove a location type, click the +/- button to open the Add/Remove Types dialog window.
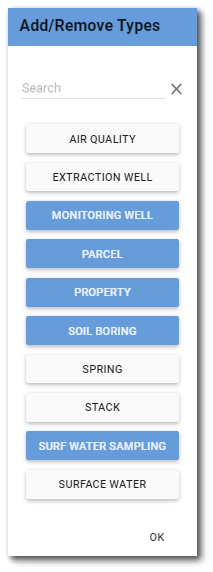
All available location types will be displayed. Selected location types are displayed as blue buttons. The Search pane at the top of the dialog box can be used to find a location type for large data sets. Select and de-select location types as desired and then click OK. The selected location types will be displayed on the Locations tab.
Click on the desired Location Type. The location type will be displayed in blue and the Location grid will be populated with database records associated with the selected location type.
Setup Grid View
By default, the Location grid displays the location code, name and type. However, users can permanently change which location fields are displayed using the gridColumns tab setting. See tab settings on how to apply this to the tab as well as other available settings. Fields (columns) can also be temporarily added or removed from the grid for the current session, by, clicking the arrow icon ![]() in the upper-left corner of the grid.
in the upper-left corner of the grid.
All available fields will be displayed in the sidebar menu. Selected fields are highlighted in blue.
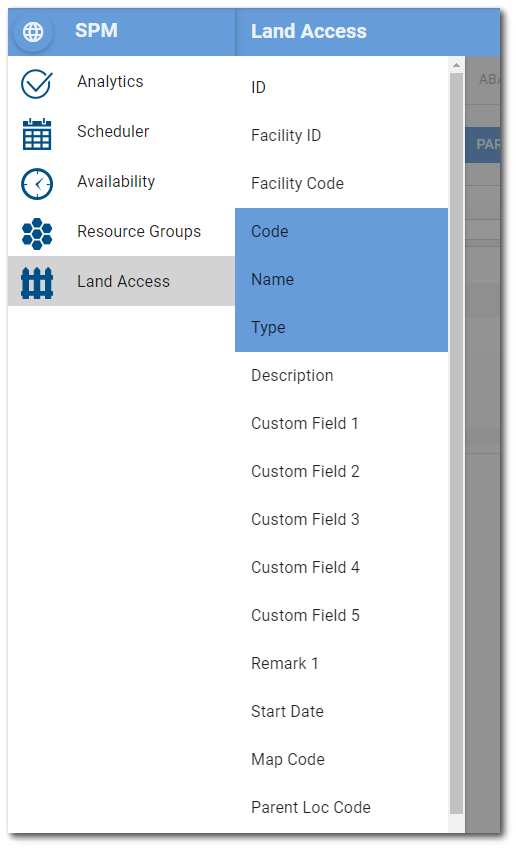
Select and deselect location fields as desired, then click anywhere on the page to close the sidebar menu. The selected fields will be displayed in the grid on the Locations tab. In the image below, the Map Code field has been added to the grid.
To resize a column width in the grid, hover the mouse over the right-side of the column header to display the || icon and then use the mouse to drag to the desired column width.
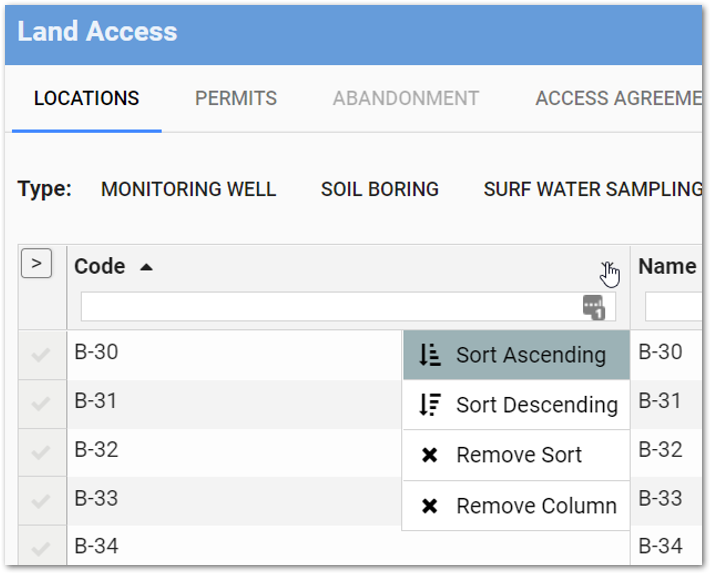
Users can also sort the data in each grid column or hide a grid column. Click the down arrow ∨ in the upper-right corner of the desired column header to open a drop-down menu. Location field values can be sorted ascending or descending. Once a sort order has been selected, a "Remove Sort" option is available.
Select Location
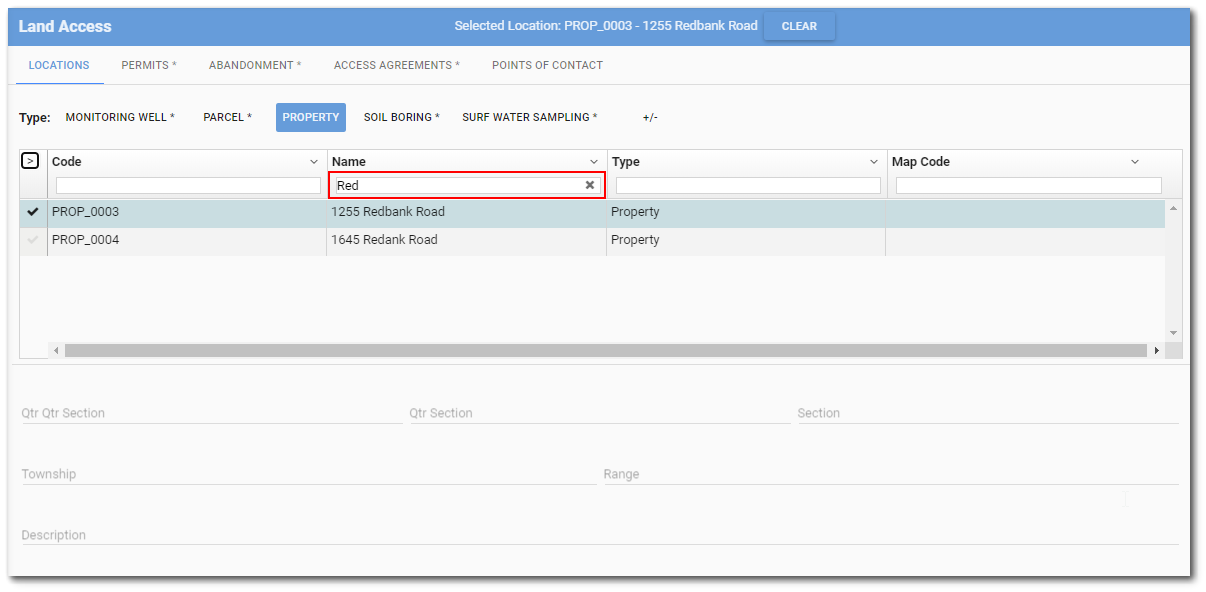
To find the desired location in the grid, either scroll through the listed locations or use the filter box beneath each column header. Enter a search term (one or more characters) in the filter box beneath the appropriate column header. Only records that contain the search term will be displayed. Filtering is cumulative if multiple columns are filtered. To clear a filter, either manually delete the entered characters or click on the X in the right-side of the filter box.
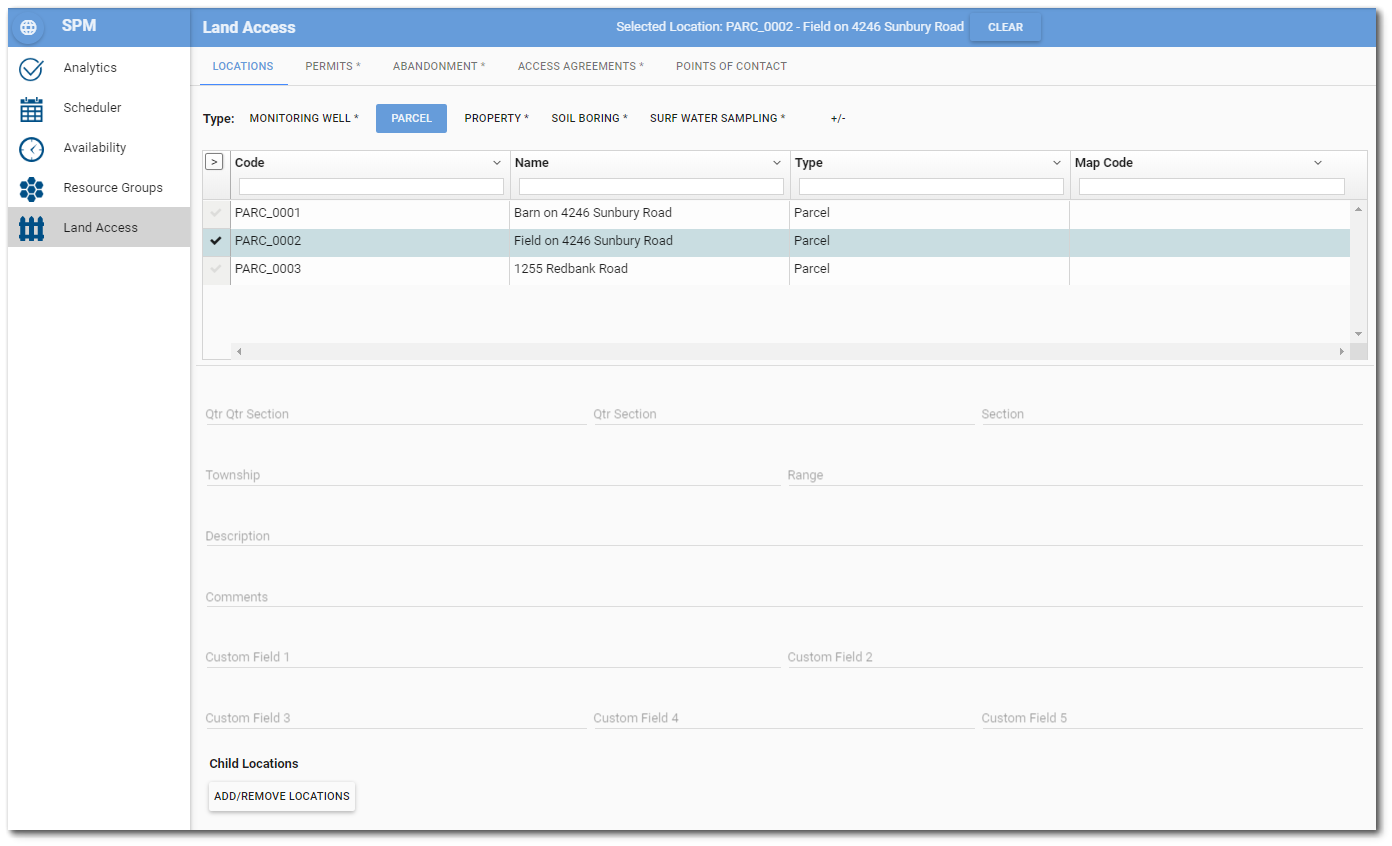
Click on the desired Location in the grid. Once a location is selected, the following occurs on the Land Access page:
•The row is highlighted.
•The Location Code and Name are displayed in the header of the page.
•Data entry boxes are displayed and enabled beneath the grid.
•Other tabs on the page may become active.
•An asterisk (*) is displayed next to the location types and other page tabs, indicating that they are being filtered by the selected location.
To clear a selected location, either de-select the location on the grid or click the Clear button on the Land Access page header.
Enter or Modify Location Information
Any existing land access information for the selected location is displayed in the text boxes beneath the grid. Enter or modify land access information as needed by typing in the text boxes.
Warning: The SPM Enterprise Land Access page is directly connected to the EQuIS database. Information entered, changed, or deleted on the page will immediately be reflected in the database tables. |
Map Code Field Generation
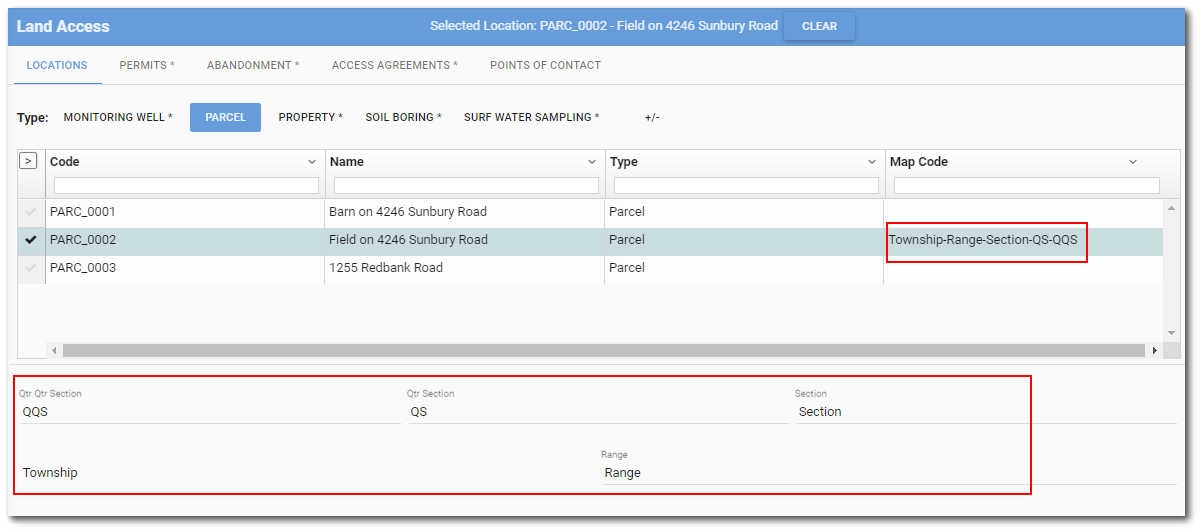
The Map Code field is designed to support the Public Land Survey System (PLSS) used in the United States. The PLSS sub-divides land into townships and sections.
Township – Townships are the largest subdivision of land in the PLSS, measuring six miles square, and are named using the township and range numbering system. Each township has a township number, which indicates its north-south position of the base line, and a range number, which indicates its east-west position of the meridian.
Range – The range number indicates east or west position from a longitudinal meridian.
Section – A section measures one mile square (640 acres). Each township has 36 sections.
Qtr Section – A quarter section is a subdivision of a section, measuring a half-mile square (160 acres).
Qtr Qtr Section – A quarter quarter section is a subdivision of a quarter section, measuring a quarter-mile square (40 acres).
The DT_LOCATION.MAP_CODE field value is automatically generated as a concatenated string separated by hyphens (-) with the following structure: [Township]-[Range]-[Section]-[Qtr Section]-[Qtr Qtr Section]. As users enter information into the data entry boxes, the map code will be created. In the example below, the map code has been added to the grid and illustrates how the field value is generated.
Other Fields
Description – Location description.
Comments – Location specific comment
Custom Fields – Custom fields 1 through 5 are available for additional location information.
Child Locations
If the selected location is a parent location, any child locations will be displayed in the Child Locations grid.
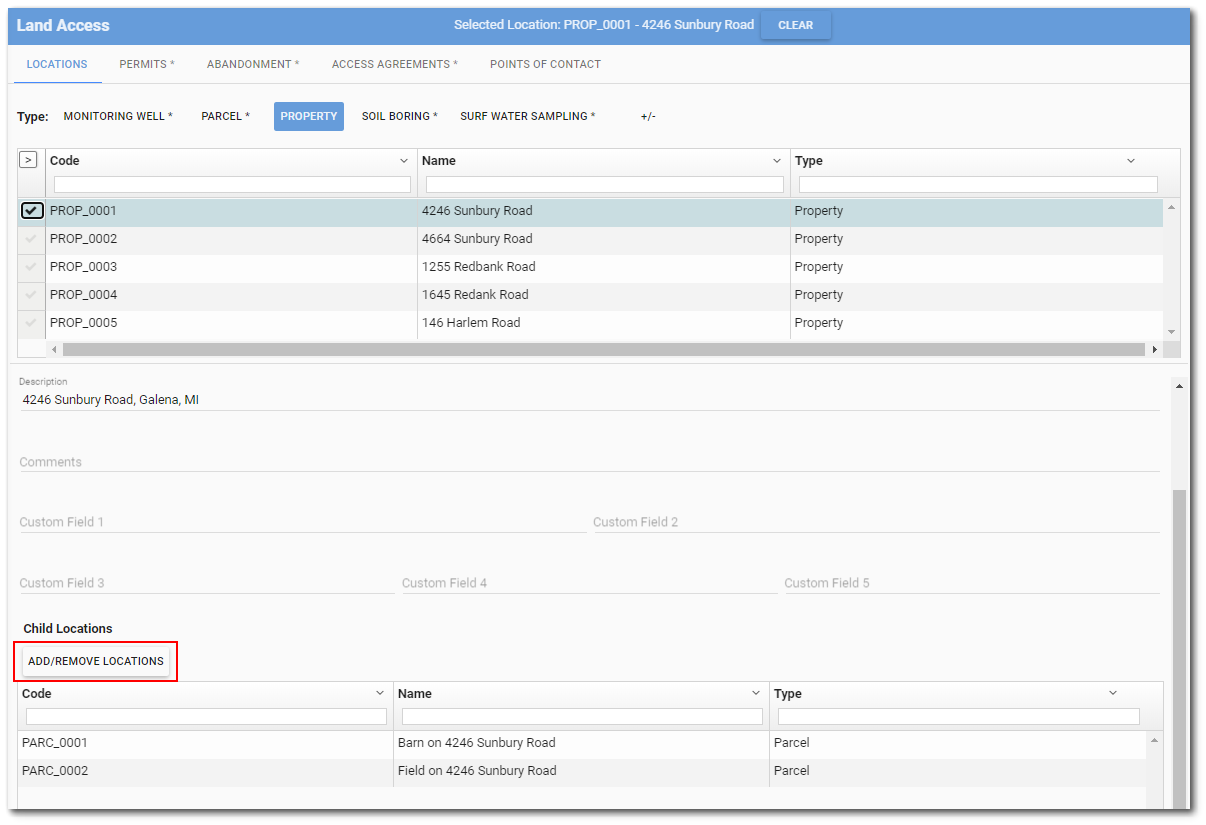
Click the Add/Remove Locations button to add or remove child locations. All available locations will be displayed in the Child Locations grid. Users can filter by location group by selecting the Group drop-down menu. Scroll, sort, or filter to find the desired location(s). Select or deselect child locations as needed.
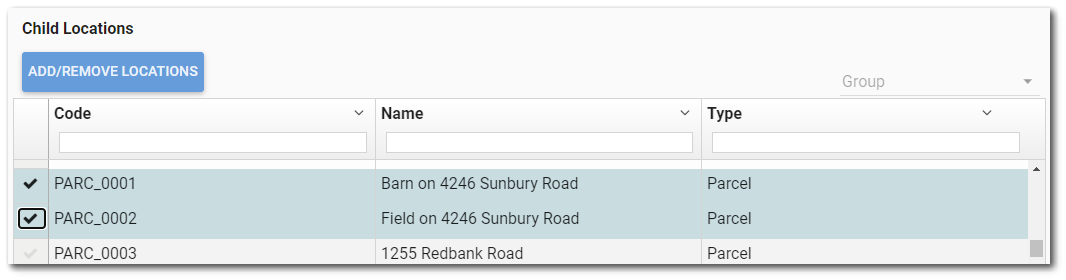
Clicking the Add/Remove Locations button again will disable the selection process and only display child locations associated with the selected parent location.