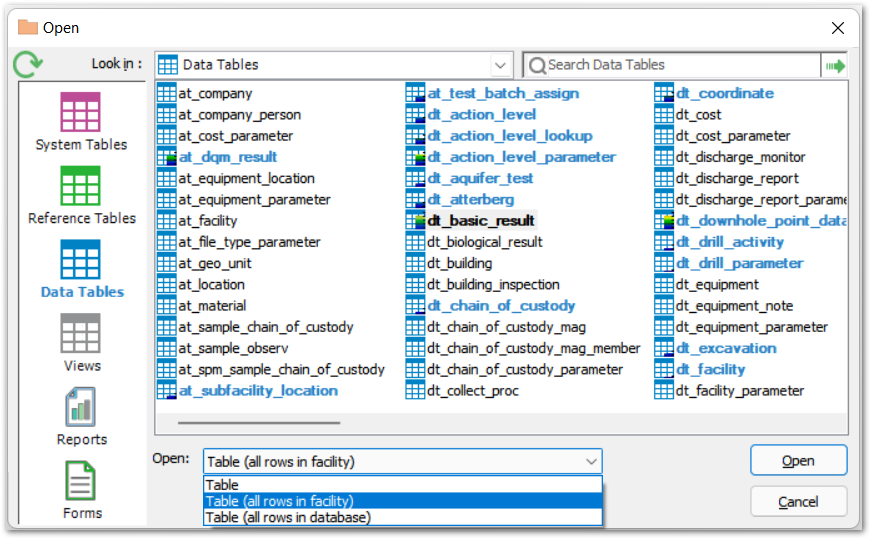
A Data Table may be opened in one of three modes. Click on the name of a Data Table in the Open window to display a drop-down list at the bottom of the window with the choices below.
These options only pertain to Data Tables. They do not exist for System Tables, Reference Tables, Views or Reports.
Type a term into the Search field at the top of the form, then select the Go button (green arrow) to the right of the field, or type Tab then Enter to search within the current section of the Open window. Results returned will contain the search term anywhere within the name.
Table (all rows in facility)
The second option is the default, Table (all rows in facility). When a table is opened in this mode, rows are displayed containing the data pertinent to that facility (i.e. FACILITY_ID in that table is equal to DT_FACILITY.FACILITY_ID where DT_FACILITY.FACILITY_CODE is the name of the current facility). For example, if several different facilities exist within a single database and the DT_LOCATION table is opened using the Table (all rows in facility) mode, every location belonging to the current facility will be displayed, but all other locations in the database in different facilities, will not be shown.
The Table (all rows in facility) option is only available if the table has a FACILITY_ID column. For a potentially large table without a FACILITY_ID column, (e.g. DT_LOGGER_DATUM), in order to open a subset of the table, first open a parent table, (e.g. DT_LOGGER or DT_LOGGER_SERIES), select the desired row and then right-click and add Child Table DT_LOGGER_DATUM. Only the subset data of the selected parent will display as shown below.
Table (all rows in database)
The third option, Table (all rows in database), opens the selected table with no regard to the current facility. The table opened will simply display all rows in the database, regardless of what facility they belong to. Be aware that this option may take longer to open a table, depending on the number of facilities in the database, table being opened (e.g. DT_RESULT typically contains many more rows than DT_LOCATION), and speed of the network over which the server is being accessed.
When logged in with application-level security, the Table (all rows in database) option is not available unless the user is part of the Admin role. It is only possible to open the table with rows for the current facility.
Table
The first option, Table merits additional explanation. If the table has more than 10,000 records, it may cause performance issues if the entire table is opened. When any table is opened using this mode, no data is displayed at all, but each column in the table is filterable. The concept behind this mode is that once the desired data is determined, then, based on the information provided, those data are displayed. The reason for this mode of operation is, again, efficiency. For any given table, it is likely that the rows of interest are a subset of that table. Rather than returning all of the rows in the table, which could be a time-consuming operation, and then narrowing the information down to the rows of particular interest, first narrow down the data of interest and then display just those rows. Of course, in order to effectively use this mode, it is necessary to be familiar with the data in the table.
Note: When using the Filter row to filter a data table in Table mode, a user may receive an error if special characters such as "#" or "," are used. As a workaround, please use a custom filter instead, as discussed in the Using Custom Filters on Data Tables page. |
Example
To illustrate the use of this mode, consider reviewing water levels in a specific well, B-34, after 1996. Instead of opening the DT_WATER_LEVEL table and displaying hundreds or thousands of records and narrowing that information down to B-34 and 1997 onwards, first indicate those parameters and then display just the information of interest. Follow the steps below.
1.Open the DT_WATER_LEVEL table with "Table" selected under the "Open:" drop-down under the list of tables.
2.With the filter row turned on, type "B-34" under SYS_LOC_CODE.
3.Click on the '=' sign on the left side of the 'measurement_date' filter cell.
4.Change it to 'Greater than or equal to'.
5.Type in the date for the first day of 1997, formatted to match how dates display in your database based on your regional settings (e.g. '01/01/1997' or '1997-01-01').
6.Click the refresh icon.
Note: The FACILITY_ID is filtered to the current facility by default. |
To display the data, click Refresh. To open a table that has already been opened in a different mode, remove the table from the Workspace. Simply closing the table and reopening it opens it in the same mode it was originally opened in. To remove it from the Workspace, right-click on the name of the table and select Remove item.
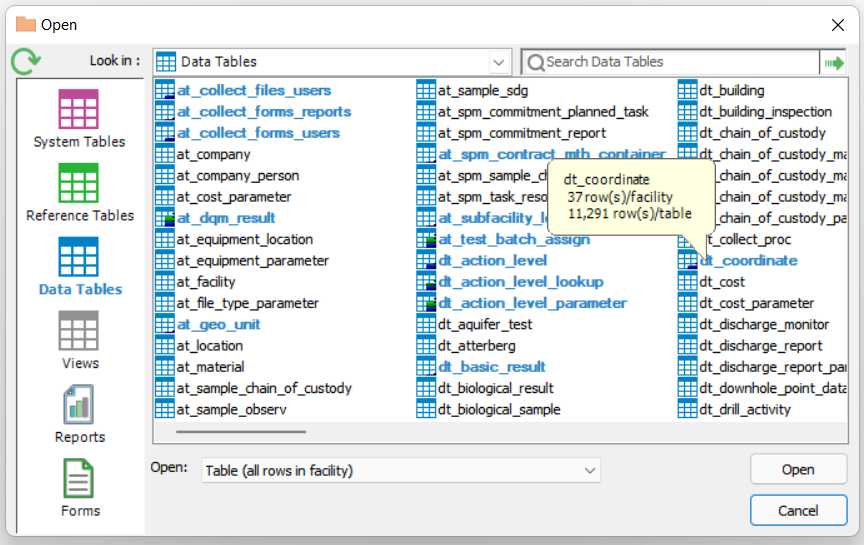
Row Counts
EQuIS Professional contains several useful features to let you visually scan your data tables and assess the number of records they contain. Within the Open window, empty data tables have their names displayed in black, while those containing data are highlighted in blue. Also, within the icon for each table there is a color-coded scale bar indicating its relative size (going from low and blue, indicating a few records, to high and orange, indicating many records). Finally, hovering your mouse over a data table will open a bubble that will show you the row count for that table.