Create a New Dashboard
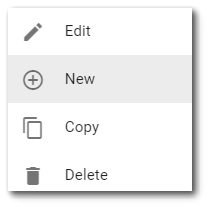
Select the More Options ![]() icon on the right-side of the dashboard header to open a drop-down menu. Click the New button within the dashboard properties to create a new dashboard.
icon on the right-side of the dashboard header to open a drop-down menu. Click the New button within the dashboard properties to create a new dashboard.
Note: The New button is only available if the user has Creator permission for dashboards. |
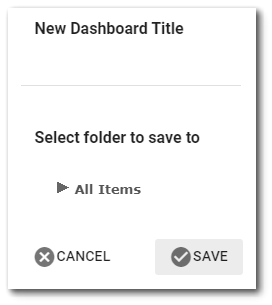
Users will be prompted to enter a title for the new dashboard and select a folder to which the dashboard will be saved. If no folder is selected, the "All Items" folder is selected by default. If the user attempts to save a dashboard to a folder where they do not have owner permission, a dialog opens informing the user that the dashboard has been inserted into the "All Items" folder.
The new dashboard will be based on a template setup in the database and identified by SDT_DASHBOARD.USER_ID = -1 and SDT_DASHBOARD.URL = "~/newdashboard". If this record is not present, then the current dashboard will be copied.
When a new dashboard is created, two sections with two columns each will automatically be generated. Two empty HTML widgets will also appear on the dashboard, one in each section. The default sections and widgets are intended to be placeholders. New dashboards will require customization. The dashboard is edit mode. See the Dashboard Editor article for more information on how to edit the new dashboard.
Copy a Dashboard
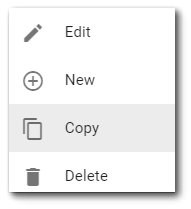
Use the Dashboard Chooser to select the dashboard to be duplicated. Select the More Options ![]() icon on the right-side of the dashboard header to open a drop-down menu. Click the Copy button within the dashboard properties to create a copy of the current dashboard.
icon on the right-side of the dashboard header to open a drop-down menu. Click the Copy button within the dashboard properties to create a copy of the current dashboard.
Users will be prompted to enter a title for the new dashboard and select a folder to which the dashboard will be saved. If no folder is selected, the "All Items" folder is selected by default. If the user attempts to save a dashboard to a folder where they do not have owner permission, a dialog opens informing the user that the dashboard has been inserted into the "All Items" folder.
The new dashboard will be a copy of the previously selected dashboard with the new title.
Downloading and Transferring a Dashboard
Dashboards may be downloaded and transferred to a different database as follows:
1.Load or refresh the dashboard page in a browser, so the address reflects the dashboard number (e.g., https://enterprise.somewhereonline.com/default.aspx?d=8733).
2.Note the dashboard number. In the example above, the dashboard number is "8733".
3.Edit the address by appending the following to the URL: /api/download/dashboard/[dashboard_id] (e.g., https://enterprise.somewhereonline.com/api/download/dashboard/8733).
4.Select the Enter key to download a ".dashboard" file.
5.If deploying a facility-specific dashboard to a database, modify the URL field within the ".dashboard" file by appending a unique name value (e.g., Line 352: "url": "f=12345&name=[unique_name]",). If the dashboard file is not facility-specific, proceed to Step 6.
Warning: For facility-specific dashboards, if the URL does not include a unique name value, existing facility-specific dashboards will be overwritten. |
6.The dashboard can now be re-deployed to the same database or another database using one of the following methods. Note that the Module Manager Widget can only be accessed by users assigned to the Administrator role.
Method 1: Appending the Site URL
•Save the dashboard download in the Enterprise deploy folder, typically at C:\Program Files\EarthSoft\EQuIS\Enterprise7\deploy.
•Load the deploy site (e.g., https://enterprise.somewhereonline.com/default.aspx?action=deploy) and login to deploy the new dashboard(s).
Method 2: Using the Module Manager Widget
•Navigate to a dashboard that currently contains the Module Manager widget or add the Module Manager widget to a dashboard.
•Drag the ".dashboard" file into the Drag and Drop section of the Module Manager widget. Select Upload.
•If the ".dashboard" file uploaded successfully, the file will appear at the top of the Module Manager grid.
•Navigate to the Dashboard Chooser and select the newly deployed dashboard.
When importing the ".dashboard" file through the Module Manager widget (POST api/modules or GET api/modules/deploy), the widget attempts to map the owner specified in the ".dashboard" file to an existing user via the following rules:
•If 0 = the dashboard's userId field, then assign the current user as the owner of the dashboard.
•Else, if 0 > the dashboard's userId field or the owner field is null or empty, assign the .system user as the owner of the dashboard.
•Else, attempt look up a user by the userId field and verify that the owner field matches either their USER_NAME or EMAIL_ADDRESS. If so, then they retain ownership of the dashboard.
•Else, attempt to find an active user with either USER_NAME or EMAIL_ADDRESS matching the dashboard's owner field. If found, that user is assigned ownership of the dashboard.
•Finally, if none of the earlier attempts succeed, then the .system user is assigned owner of the dashboard.
Note: References to user reports will not transfer due to the unique user and ID references between databases. These dashboard components will require manual updates. |