Form Name: Docs & Photos
File Name: N/A
Software: EQuIS Professional
Source: EQuIS Professional install
Description: The Docs & Photos form is used to upload files for storing in DT_FILE. These files may include images that can then be associated with a location or location types, spreadsheets or templates for use in report output. The file type associations are stored in RT_FILE_TYPE.
Installation Instructions: The Docs and Photos form is included with the EQuIS Professional installer. No additional steps are necessary.
Overview:
Upload Images
Click on the Forms button and complete the steps below.
1.Select Docs & Photos.
2.Navigate to where the file or files are located.
3.Select the file or files.
4.Click on the top button to transfer the files to the database. This will create a new record in DT_FILE associated with the file that was uploaded.
5.Close the Docs & Photos window.
It is also possible to download the files by clicking on the bottom button.
View and Edit Properties of Uploaded Files
1.Open DT_FILE.
Associate Image with Specific Location
In the record of the image file, the following steps will associate an image file to a location.
1.In the PLACE_TYPE field, enter "sys_loc_code".
2.In the PLACE_CODE field, enter the sys_loc_code value (e.g., B-30).
Associate Images with Location Types
In the record of the image file, the following steps will associate an image file to a Location Type. This image will be used as an icon in Google Earth for each point with that Location Type.
1.Add "LOCATION_TYPE_CODE" to the "PLACE_TYPE" field and the name of the location type in the PLACE_CODE to the record of the image file. This information can be found in DT_LOCATION in the LOC_TYPE field and in RT_LOCATION_TYPE.
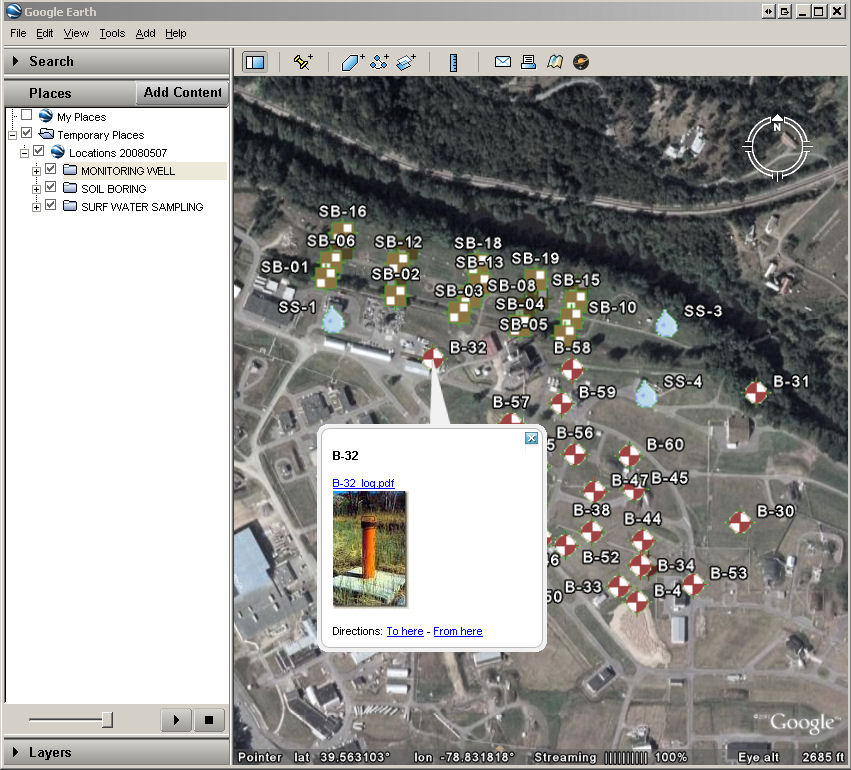
Show Associated Images in Google Earth
1.Click the Reports button.
2.Select the Google Earth: Locations Report.
3.Choose the appropriate parameters, and under "Description:" select "Embed Files".
4.Run the report.
Google Earth should open and navigate to the locations. In addition, if you designated an image for Location Type those icons will be visible and/or the associated image(s) will be visible if a specific location is clicked on.
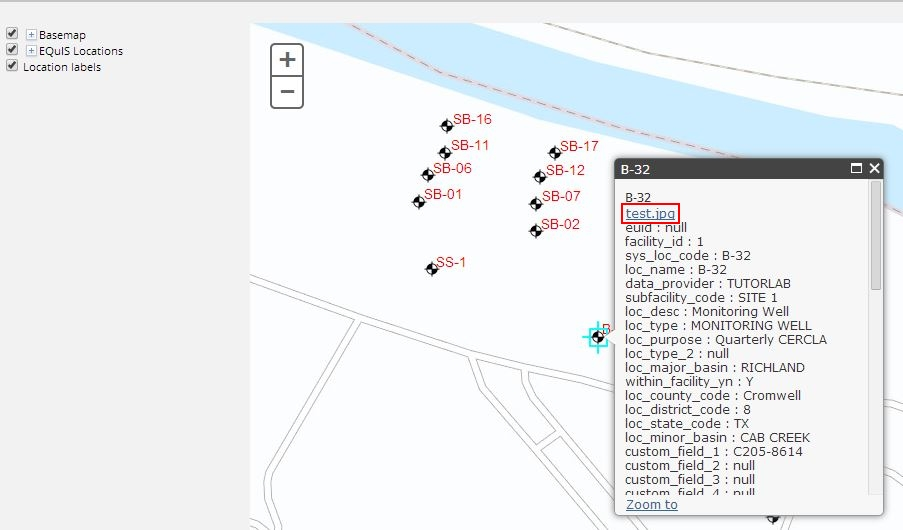
Download Associated Images from Enterprise Map Widget
1.Click on your location on the Map Widget and the link to the file will be shown in the Info Table.
2.Click the link to download the file.
Additional Information: Sorting Docs and Photos in Enterprise now also includes the DISPLAY_ORDER field. |
Troubleshooting
Issue: Locations or Location Layer not Displayed
If your locations do not display on the map, confirm that the locations are present in VW_LOCATION. DT_FACILITY has to have the following fields populated: DT_FACILITY.IDENTIFIER and DT_FACILITY.COORD_TYPE_CODE in order to properly populate VW_LOCATION. For more information on how VW_LOCATION works, please read VW_LOCATION Toolbar - GUI and Identifier.
Issue: Receive the following message when opening the Docs & Photos Form.
The multi-part identifier"g.facility_id" could not be bound. No column name was specified for column 1 of 'fac'. |
The message above appears for non-administrative users when opening the form. Click OK to clear the message and continue using the form.